Best Hybrid Ski Bindings of 2026
If you love skiing both on groomed runs and in deep powder, hybrid ski bindings are a game-changer. They let you switch between alpine and touring modes, so you can ride the lifts and then head into the backcountry without needing two different pairs of skis. They offer the perfect mix of downhill safety and uphill freedom. In this article, we break down the best hybrid bindings on the market to help you find the right pair for your style.
1. Salomon S/Lab Shift 13 MN

- DIN Range: 6-13
- Boot Compatibility: Alpine (ISO 5355), GripWalk (ISO 23223), Touring (ISO 9523)
- Weight (Pair): 4 lbs. 1 oz.
- Adjustment Range: 30 millimeters
Combining solid downhill performance with a seamless uphill experience, the Salomon S/Lab Shift2 13 MN alpine touring ski bindings will give you the confidence to explore deep into the backcountry. The intuitive toe design transitions smoothly between touring pin mode and full alpine downhill capability.
With an adjustment range of 30 millimeters and comprehensive boot sole compatibility, this binding ensures secure power transfer across varied terrain. The inclusion of heel lifts optimizes efficiency during steep backcountry ascents, making it a complete option for demanding freeride skiers.
- Pros: Seamless uphill and downhill transitions, wide boot sole compatibility, integrated heel lift.
- Cons: Heavier than traditional pin bindings, limited DIN range for very light skiers.
See the Salomon S/Lab Shift 13 MN
2. Marker Duke PT 13

- DIN Range: 4-13
- Skill Level: Intermediate
- Weight (Pair): 2 lbs. 13.8 oz.
- Adjustment Range: 240-360 millimeters
Get the most out of dawn patrols with the Marker Duke PT 13 ski bindings combining seamless uphill performance with downhill power in a design compatible with alpine, touring and GripWalk boots. The ride and hike toe mechanism delivers versatile climbing efficiency alongside full alpine release security.
Featuring a generous adjustment range from 240 to 360 millimeters, it easily adapts to various boot sizes. Designed for intermediate skiers, it balances downhill control with uphill functionality, including integrated heel lifts to make long climbs more manageable throughout demanding tours.
- Pros: Convertible toe design reduces uphill weight, wide adjustment range, versatile boot compatibility.
- Cons: Removable toe housing must be stored while touring, slightly complex transition process.
3. Marker Duke PT 16

- DIN Range: 6-16
- Skill Level: Advanced
- Weight (Pair): 2 lbs. 15.6 oz.
- Adjustment Range: 241-360 millimeters
For big-mountain and backcountry chargers alike, Marker Duke PT 16 ski bindings pair seamless uphill performance with downhill power in a design that works with alpine, touring and GripWalk boots. Built for aggressive skiing, this model provides extreme retention and high-impact resistance on hard descents.
The system incorporates built-in heel lifts to assist on steep climbs while preserving full alpine performance on the way down. With a high release value going up to 16, it supplies advanced skiers with maximum confidence in challenging terrain.
- Pros: High DIN rating for aggressive skiers, robust downhill power, multi-norm boot compatibility.
- Cons: Heavier overall construction, removable toe components require careful handling in deep snow.
4. Tyrolia Attack Hybrid 14 MN/PT

- DIN Range: 4-14
- Skill Level: Advanced
- Weight (Pair): 2 lbs. 7.68 oz.
- Boot Compatibility: Alpine, GripWalk, Touring, and Tech
Go from full touring to powerful freeride mode with these Tyrolia hybrid ski bindings. The exchangeable toes let you swap from pins to alpine toes without tools, making mode switching straightforward while out in the field. This setup offers incredible flexibility for advanced riders.
Weighing under 2.5 pounds per pair, it offers a lightweight chassis without sacrificing energy transmission on hard snow. Broad boot compatibility ensures seamless integration with virtually any standard boot sole type, complemented by built-in heel lifts for efficient ascents.
- Pros: Tool-free exchangeable toe system, lightweight overall weight, compatible with Tech boots.
- Cons: Swappable toe pieces must be carried separately, lower DIN capacity than heavy-duty freeride models.
See the Tyrolia Attack Hybrid 14 MN/PT
5. Tyrolia Attack Hybrid 11 MN/PT

- DIN Range: 3-11
- Skill Level: Intermediate
- Weight (Pair): 2 lbs. 5.57 oz.
- Boot Compatibility: Alpine, GripWalk, Touring, and Tech
Go from full touring to powerful freeride mode with these Tyrolia hybrid ski bindings. The exchangeable toes let you swap from pins to alpine toes without tools, offering an accessible entry point for intermediate skiers stepping into touring. The lower starting DIN accommodates lighter skiers well.
At just over 2 pounds 5 ounces per pair, this binding keeps gear light on long approaches. Integrated heel lifts aid in efficient climbing, while the toolless toe mechanism ensures hassle-free transitions when switching between uphill touring and downhill freeriding modes.
- Pros: Low weight for easier touring, lower minimum DIN for lighter skiers, tool-free toe swapping.
- Cons: Max DIN of 11 limits use for aggressive chargers, requires carrying alternate toe pieces.
See the Tyrolia Attack Hybrid 11 MN/PT
6. CAST Freetour 2.0 Pivot 15
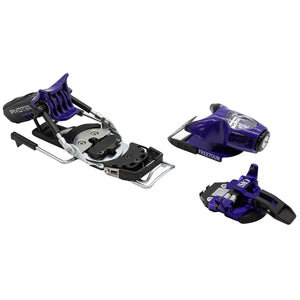
- DIN Range: 6-15
- Skill Level: Advanced-Expert
- Boot Compatibility: Alpine DIN, GripWalk, Alpine Touring, Tech
- Length: Any
Made for all-mountain freeskiing, the Look Pivot 2.0 15 ski bindings provide powerful shock absorption and travel for consistent performance when you need it, plus retention and release you can trust. The CAST conversion system brings full pin-toe touring efficiency to a classic alpine design.
Targeted at advanced and expert skiers, this binding system delivers true alpine heel elasticity during aggressive descents. Its versatile design accepts standard tech toes for the climb, uniting touring capability with uncompromised freeride control on the descent.
- Pros: Industry-leading heel elasticity, full alpine release security, exceptionally durable build.
- Cons: Requires manual swapping of toe pieces, heavier system setup compared to dedicated pin bindings.
See the CAST Freetour 2.0 Pivot 15
How to Choose Hybrid Ski Bindings: A Complete Guide
If you have ever stood at the top of a ski resort looking at the untouched powder beyond the ropes and wished you could ski it, hybrid ski bindings are your ticket there. These clever pieces of gear let you ride the chairlift like a normal alpine skier, then click your heels free to hike up into the backcountry for fresh tracks. But with so many models on the market, choosing the right pair can feel overwhelming. This guide breaks down everything you need to know in simple, plain language. By the end, you will know exactly what to look for, what questions to ask, and which features matter most for your style of skiing.
What Exactly Are Hybrid Ski Bindings?
Before you choose, it helps to understand what hybrid bindings actually are. Traditional alpine bindings are fixed. They lock your boot in place and only release when you fall. Touring bindings, on the other hand, have a hinge at the toe that lets your heel lift up so you can walk uphill. Hybrid bindings combine both. They are built strong enough for resort skiing and aggressive downhill runs, but they also have a walk mode that lets you skin up mountains. Think of them as the Swiss Army knife of ski gear. They are heavier than pure touring bindings but much more durable and safer for high-speed skiing. They are lighter than pure alpine bindings but give you the freedom to explore outside the resort.
The key point is this: hybrid bindings are a compromise. You give up a little weight savings for a lot of downhill performance. You give up a little resort stiffness for a lot of uphill mobility. The best hybrid binding for you depends entirely on how you plan to use it.
Step 1: Know Your Skiing Style
This is the most important question you need to answer honestly. Are you mostly a resort skier who wants to occasionally duck out the back gate? Or are you a backcountry enthusiast who only skis lifts on storm days? Your answer changes everything.
Resort-first skiers (80/20)
If you spend 80% of your time on groomed runs and 20% exploring side-country, you want a hybrid binding that leans heavily toward alpine performance. Look for bindings with a high DIN setting (10 or above), metal construction, and minimal compromises in elasticity (the ability to absorb shocks before releasing). These bindings will be heavier, but you will barely notice that weight on the chairlift. What you will notice is the solid, confidence-inspiring feel when you carve hard on icy mornings.
Backcountry-first skiers (20/80)
If you are the opposite — 80% touring and only 20% resort skiing — you want a lighter binding that climbs well. You can sacrifice some downhill stiffness for weight savings. Look for bindings with lower DIN ranges (around 8–10), lighter materials like aluminum or carbon composites, and smoother heel risers for steep ascents. These bindings will still ski well in the resort, but they will not be as burly as resort-first models. That is a fair trade when you are hiking 2,000 vertical feet.
True 50/50 skiers
If you genuinely split your time equally, you need a true middle-ground binding. These are the most popular hybrid bindings on the market. They feature a DIN of 10–13, a mix of metal and plastic construction, and a reliable walk mode. They are not the lightest, nor the stiffest, but they do everything reasonably well. For most recreational skiers, this is the sweet spot.
Step 2: Understand DIN and Release Values
DIN stands for Deutsche Industrie Norm. It is the standardized number that determines how much force is needed for your binding to release in a fall. A higher DIN means the binding holds tighter and releases harder. A lower DIN means it releases more easily.
Hybrid bindings usually have a DIN range printed on them, like 6–12 or 8–14. Which one is right for you? It depends on your weight, height, age, and skiing ability. Here is a simple guide:
- Beginner or light skiers (under 150 lbs): Look for a DIN range starting at 4–6. You will never need more than 9.
- Intermediate recreational skiers (150–180 lbs): A range of 6–10 is plenty. Most hybrid bindings in this range work great.
- Advanced or heavy skiers (over 180 lbs): You need a DIN of 10 or higher. Look for bindings that go up to 12, 13, or even 14.
- Expert or aggressive skiers: Go for a binding with a top DIN of 12 or above. You want the binding to hold firm during hard carves and big drops.
A good rule of thumb: it is better to have a binding with a higher max DIN than you need, rather than one that is maxed out. Running a binding at its maximum DIN reduces its elasticity and can lead to pre-releases. Always leave at least one full number of room above your calculated DIN.
Step 3: Weight Matters — But Not How You Think
Every hybrid binding has a weight listed in grams. Light bindings (under 500 grams per binding) are great for touring. Heavy bindings (over 700 grams) are great for resort skiing. The catch is that many skiers obsess over saving 100 grams, but forget that their skis, boots, and backpack weigh far more.
Here is simple advice: if you do more than five backcountry days per season, care about weight. Every gram on your foot costs energy on the climb. If you mostly ski lifts, do not worry about weight. A heavier binding will ski better on hard snow and absorb vibrations more smoothly. You can always shed weight elsewhere, like choosing lighter skis or a lighter pack.
Also consider that heavier bindings often use more metal, which means they last longer and require less maintenance. If you are on a budget, buying a slightly heavier but more durable binding can save you money over time.
Step 4: Riser Height and Climbing Ease
When you are hiking uphill, the heel of your boot lifts with each step. Hybrid bindings have small levers called risers that prop up the heel at different angles. Most bindings offer two or three riser heights: flat (no rise), low (about 5–7 degrees), and high (about 10–13 degrees).
Here is what to look for:
- Two riser heights: Usually enough for moderate slopes. Simple and reliable.
- Three riser heights: Better for steep or varied terrain. Gives you more options to save calf energy.
- Tool-free adjustment: Make sure you can flip risers with your ski pole or glove. Some older models require fiddly hand adjustments, which is a pain in cold weather.
If you ski in areas with rolling hills, you might only use the flat mode. If you frequently climb steep couloirs, you will appreciate a high riser. Test the riser action in the shop before buying. It should click firmly and not feel flimsy.
Step 5: Brakes vs. Leashes
Almost all hybrid bindings come with ski brakes — the little arms that pop down when you release from the binding to stop your ski from sliding away. But some ultralight hybrid bindings omit brakes to save weight, requiring you to use a leash that attaches your ski to your leg.
Here is the straightforward take:
- Choose brakes if you ski in resorts or around other people. A runaway ski is dangerous and annoying. Brakes are safer and more convenient.
- Choose leashes only if you are a weight-obsessed tourer who mostly skis in remote backcountry areas with no crowds. Even then, many skiers prefer brakes for peace of mind.
If you get a binding with brakes, make sure the brake width matches your ski waist width. A brake that is too narrow will not clear the ski. A brake that is too wide will stick out and catch snow. Most manufacturers offer brakes in sizes like 90–100 mm, 100–110 mm, and 110–120 mm. Measure your ski waist and choose the closest size. You can usually bend brakes slightly to fit, but it is easier to buy the correct size from the start.
Step 6: Toe Piece Design — Alpine vs. Tech
This is one of the biggest differences between hybrid bindings. Some use a standard alpine-style toe piece with spring-loaded jaws. Others use a tech (or pin) toe that has two small pins that insert into metal fittings in your boot.
- Alpine-style toe: Heavier, but offers more elasticity and shock absorption. Better for resort skiing, big drops, and variable snow. Releases more consistently in falls.
- Tech (pin) toe: Lighter, and offers a more natural walking motion. Better for long tours and steep climbs. But it has less elasticity, so it can pre-release on hard impacts if not set perfectly.
For a true hybrid that spends significant time in resorts, choose an alpine-style toe. For a touring-heavy hybrid, choose a tech toe. Some newer bindings offer a hybrid toe that combines both — they have pins for touring and a spring-loaded jaw for downhill. These are excellent but expensive.
Step 7: Ease of Transition
How fast and easy is it to switch from ski mode to walk mode? This matters more than you think. On a cold, windy day, fumbling with tiny levers is miserable. Look for these features:
- One-step heel release: Some bindings let you flip a single lever to unlock the heel for walking. Others require you to manually rotate the heel piece. One-step is faster.
- Toe lock/unlock: If you have a tech toe, you need to lock the pins for downhill and unlock for uphill. Make sure the mechanism is easy to operate with gloves on.
- Visual indicators: Many bindings have red or green markers to show if you are in ski or walk mode. This is a simple safety feature that prevents you from accidentally skiing with your heel unlocked.
Visit a shop and try the transition on a demo binding. Do it three times. If it frustrates you, that frustration will only grow in real snow conditions. Choose a binding that feels intuitive.
Step 8: Boot Compatibility
Not all ski boots work with all hybrid bindings. You need to check two things:
- Sole type: Most modern hybrid bindings work with both alpine (ISO 5355) and touring (ISO 9523) boot soles. But some older bindings only accept one type. Look for bindings labeled “Multi-norm” or “MNC” — those work with both.
- Toe insert fittings: For tech toes, your boot must have metal pin inserts in the toe. Most touring boots have these, but many resort boots do not. If your boots lack inserts, you cannot use a tech-toe binding.
If you are buying new boots at the same time as bindings, take both to a shop to have them mounted and tested together. This ensures perfect compatibility and safe release settings.
Step 9: Budget and Value
Hybrid bindings range from about $300 to over $800. Here is how the pricing breaks down:
| Price Range | What You Get | Best For |
|---|---|---|
| $300 – $450 | Basic hybrid bindings with plastic parts, lower DIN ranges (6–10), and heavier weight. Reliable but not fancy. | Beginner to intermediate skiers on a budget. Occasional tourers. |
| $450 – $650 | Mid-range bindings with more metal, DIN up to 12, and smoother risers. Good weight balance. | Recreational 50/50 skiers who want solid performance everywhere. |
| $650 – $800+ | Premium bindings with full metal construction, high DIN (12–14), lightweight materials, and excellent transition ease. | Aggressive skiers, backcountry enthusiasts, and anyone who skis 50+ days a year. |
Remember that the most expensive binding is not always the best for you. A mid-range binding with a DIN that fits your weight and ability will perform just as well as a premium model for most recreational skiers. Spend your money on a binding that matches your skiing style, not on features you will never use.
Step 10: Mounting and Adjustment
Hybrid bindings have a mounting plate that attaches to your ski. Some allow for tool-free fore-aft adjustment so you can change your boot center position without remounting. This is helpful if you share skis with someone else or if you want to experiment with a more forward or rearward stance.
If you are unsure about your ideal mounting point, choose a binding with an adjustable track. It costs a little more but saves you from drilling new holes later. Otherwise, have a professional shop mount your bindings based on your boot sole length and your recommended mount point (usually marked on the ski).
Do not mount hybrid bindings yourself unless you have experience and the correct tools. Incorrect mounting can lead to pre-releases, injuries, or damaged skis. Pay the $40–$60 for a shop mounting — it is worth every penny.
Final Checklist Before You Buy
To make your decision easier, here is a quick summary checklist. Go through each point and rate the binding you are considering.
- Does the DIN range match my weight and ability? (Leave room above your set DIN.)
- Is the weight appropriate for my touring-to-resort ratio?
- Are the riser heights sufficient for the terrain I climb?
- Does it have brakes that fit my ski waist width?
- Is the toe design (alpine or tech) right for my boot and skiing style?
- Is transitioning from ski to walk mode easy with gloves on?
- Are my boots compatible (sole type and toe inserts)?
- Does the price fit my budget without sacrificing safety?
- Will a professional shop mount it correctly?
Choosing hybrid ski bindings does not have to be complicated. Focus on your personal skiing habits first, then look at the technical specs. Remember that no binding is perfect for everyone. The best binding is the one that makes you feel safe, confident, and excited to ski both in and out of the resort. Take your time, try a few demos if possible, and ask shop staff for their honest opinions. With the right hybrid binding, you will unlock a whole new world of skiing adventure.