Best Mid Layers for Snowboarding of 2026
When you’re snowboarding, staying warm without getting too sweaty is the key to a great day on the mountain. That’s where a mid layer comes in. It’s the jacket or fleece you wear over your base layer and under your shell. Its job is to trap heat while letting moisture escape. The right one keeps you comfortable during chairlift rides and active runs. In this article, we break down the best mid layers for snowboarding, so you can ride longer and stay drier.
1. Patagonia R1 Air Full-Zip Hoody
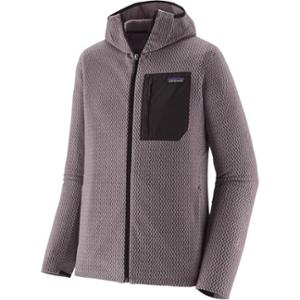
- Fabric: 5.7 oz 100% recycled polyester jacquard fleece with hollow-core yarns, bluesign-approved
- Weight: 13 oz / lightweight
- Hood: Yes, adjustable
- Back Length: Hip-length
This fleece is a masterclass in active insulation. The hollow-core yarns trap heat while maintaining exceptional breathability, making it ideal for high-output pursuits in cool weather. The jacquard knit structure allows air to circulate, preventing that clammy feeling when you’re working hard on the trail. It’s remarkably quick-drying, so you stay comfortable even if you work up a sweat. The hood adds essential warmth without being bulky, and the full-zip design makes venting easy.
Patagonia’s commitment to sustainability shines through with its recycled construction and bluesign-approved fabric. The fit is athletic and streamlined, layering perfectly under a shell or standing alone. While the 13-ounce weight is light, the warmth-to-weight ratio is impressive. It’s the go-to layer for spring skiing, cool-weather hikes, or any activity where you need dependable warmth without overheating.
Pros: Excellent breathability, quick-drying, sustainable materials, great mobility.
Cons: Pricey, athletic fit may be snug for some.
See the Patagonia R1 Air Full-Zip Hoody See the Women’s R1 Air Full-Zip Hoody
2. REI Co-op Trailmade Snap
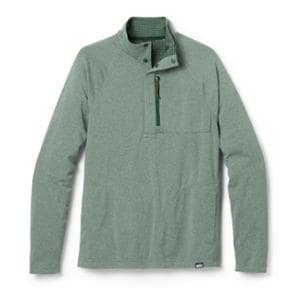
- Fabric: Polyester fleece with grid-back
- Sun Protection: UPF 50+
- Closure: Partial-snap placket with hidden snaps
- Back Length: 28.75 inches (all sizes)
This snap-front fleece is a casual, versatile layer perfect for crisp autumn days. The grid-back construction enhances breathability while providing noticeable warmth, making it a solid choice for light hiking or everyday wear. The hidden snap placket gives it a clean, modern look that stands out from standard zip-up fleeces. With a UPF rating of 50+, it also offers excellent sun protection, an often-overlooked feature in fleece layers.
Practicality is key here, with two hand pockets and a zippered chest pocket to secure your essentials. The hip-length cut is standard, and the 28.75-inch back length across all sizes ensures a consistent fit. It’s moisture-wicking, so you stay dry during light activity. While it lacks a hood, the simple design makes it an easy layering piece for a wide range of outdoor and casual scenarios.
Pros: Great sun protection, stylish snap design, moisture-wicking, good pocket layout.
Cons: No hood, not as warm as heavier fleeces.
See the REI Co-op Trailmade Snap See the Women’s Trailmade Snap
3. REI Co-op Trailmade Fleece Jacket
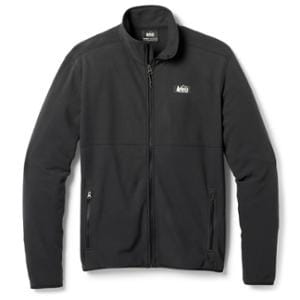
- Fabric: 100% recycled polyester fleece
- Fleece Weight: Medium
- Weight: 12.7 ounces
- Back Length: 28 inches (hip-length)
This is the quintessential camp-friendly fleece that excels as a standalone on chilly days or as a cozy midlayer under a hardshell. Made entirely from recycled polyester, it offers a soft, warm feel without being overly bulky. The medium-weight fabric strikes a perfect balance, providing substantial warmth for shoulder-season adventures while remaining flexible for movement. The hip-length cut and 28-inch back length offer good coverage and a classic outdoor silhouette.
Designed for both comfort and utility, the Trailmade Jacket is a reliable choice for a wide range of activities, from hiking to lounging around the campsite. Its 12.7-ounce weight makes it light enough to pack easily, yet it delivers a warm, cozy feel. The lack of a hood keeps it simple and compatible with any shell. It’s a durable, sustainable, and budget-friendly option that doesn’t compromise on warmth or comfort.
Pros: Sustainable materials, great warmth-to-weight ratio, versatile, affordable.
Cons: No hood, minimal features.
See the REI Co-op Trailmade Fleece Jacket See the Women’s Trailmade Fleece Jacket
4. Coalatree Baseline Midlayer
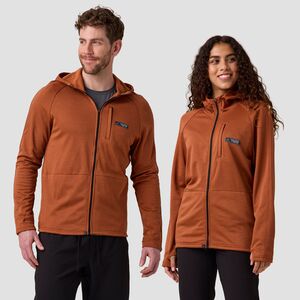
- Fleece Weight: Midweight
- Pockets: 2 hand, 1 chest
- Venting: Full-length front zipper
- Length: Hip-length
The Coalatree Baseline Midlayer is a rugged and functional fleece built for the active lifestyle. Its midweight construction provides reliable warmth for hiking, camping, or travel, while the full-length zipper offers quick ventilation when you heat up. The fleece is soft against the skin and feels durable enough to withstand regular use in the backcountry. The addition of a chest pocket and two hand pockets gives you convenient storage for small essentials like a phone or map.
This jacket is designed with mobility in mind, featuring a hip-length cut that doesn’t restrict movement. Its casual aesthetic transitions well from trail to town, making it a versatile piece for any adventurer. The full-zip design makes it easy to put on and take off, and the hood provides extra warmth when the wind picks up. It’s a straightforward, no-nonsense midlayer that covers all the basics with a focus on durability and comfort.
Pros: Durable feel, good pocket layout, full-zip venting, versatile for various activities.
Cons: Heavier than some options, hood may be bulky.
See the Coalatree Baseline Midlayer
5. Columbia Steens Mountain 2.0
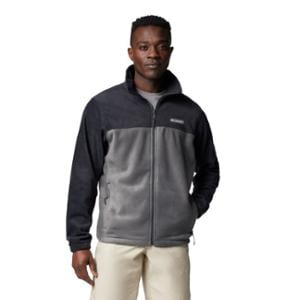
- Fabric: Polyester MRT filament fleece
- Fleece Weight: Medium
- Back Length: 28 inches (hip-length)
- Closure: Full-zip front
The Columbia Steens Mountain 2.0 is a classic, no-frills fleece that has stood the test of time. Made with soft, durable MRT filament fleece, it delivers dependable warmth for casual outings and everyday wear. The medium-weight fabric is cozy and comfortable, making it a go-to layer for cool mornings or evenings. The full-zip front and hip-length cut (28 inches) provide a standard fit that works well over a t-shirt or under a heavier jacket.
This jacket is all about simplicity and value. It offers the warmth you expect from a traditional fleece without any complicated features. While it lacks a hood and technical bells and whistles, its straightforward design makes it incredibly easy to wear. It’s a reliable, budget-friendly option that excels at providing basic insulation. The soft texture and classic look make it a favorite for those who appreciate functional, no-nonsense outdoor apparel.
Pros: Classic design, soft and durable fabric, good value, reliable warmth.
Cons: No hood, basic features, not as breathable as technical fleeces.
See the Columbia Steens Mountain 2.0 See the Women’s Benton Springs
How to Choose Mid Layers for Snowboarding
Choosing the right mid layer for snowboarding can feel confusing with so many options on the market. But it is actually simpler than it seems. The mid layer is the most important piece of clothing for comfort on the mountain. It sits between your base layer (the thin one against your skin) and your outer shell (the waterproof jacket). Its main jobs are to trap body heat and let sweat escape. If you get this wrong, you will either freeze on the chairlift or overheat while riding. This guide will walk you through everything you need to know to pick the perfect mid layer for your style, budget, and local weather conditions.
Why the Mid Layer Matters More Than You Think
Many beginners think that a thick hoodie or a heavy sweater is enough for snowboarding. That is a mistake. Regular cotton hoodies soak up sweat and make you cold. The right snowboarding mid layer is designed with technical fabrics that work with your body. It creates a pocket of warm air around your torso while pushing moisture out to the outer layer where it can evaporate. This process is called moisture management. Without a good mid layer, you will experience what riders call the “freeze-thaw cycle.” You sweat during a tough run, then sit still on the lift, and the wet fabric chills you to the bone. A quality mid layer stops that from happening.
Key Factors to Consider
Before you buy any mid layer, think about these five important things. They will guide every decision you make.
1. Insulation Type
This is the biggest choice you will make. There are two main categories: synthetic insulation and natural down insulation.
- Synthetic insulation: Made from polyester fibers that mimic down. It stays warm even when damp, dries quickly, and is usually cheaper. Great for wet or humid snow conditions. Examples include PrimaLoft, Thermoball, and Coreloft.
- Down insulation: Made from duck or goose feathers. It is incredibly warm for its weight and packs down small. However, it loses almost all warmth when wet and takes forever to dry. Best for very cold, dry climates like the Rocky Mountains.
- Fleece: Not really insulation in the same way, but a thick fleece (like Polartec 200 or 300) traps heat well and breathes amazingly. It is the most versatile and budget-friendly option for most riders.
2. Breathability vs. Warmth
Snowboarding is a high-energy sport. You will work up a sweat even on cold days. A mid layer that is too warm will trap sweat against your body. A mid layer that is too breathable will let all your warmth escape. Look for a balance. If you ride hard and fast, prioritize breathability. If you ride slowly with lots of lift breaks, prioritize warmth. Many brands give a warmth-to-weight ratio in their product descriptions. Use that as a guide.
3. Fit and Mobility
Your mid layer should fit snugly but not tightly. You need room for a base layer underneath and a shell on top. If it is too tight, it will restrict your arm movements when you reach for toe-side turns. If it is too loose, it will bunch up and feel uncomfortable. Look for features like:
- Articulated sleeves that bend with your arms.
- Stretchy side panels for extra freedom.
- A drop-tail hem that covers your lower back when you bend forward.
4. Weather Conditions
Where and when you ride changes everything. A mid layer for spring slush in California is totally different from one for January in Vermont. Here is a quick breakdown:
- Mild days (above 0°C / 32°F): A thin fleece or a lightweight synthetic vest works perfectly.
- Average days (-5°C to -15°C / 23°F to 5°F): A medium-weight fleece or a lightly insulated synthetic jacket (60-80g fill) is ideal.
- Very cold days (below -15°C / 5°F): Choose a heavy down jacket or a high-fill synthetic (120g+) to pair with a non-insulated shell.
5. Packability
If you hike for your runs or like to strip layers during the day, packability matters. Down packs down to the size of a water bottle. Synthetic packs a bit larger but still fits in a backpack. Fleece does not pack well at all. If you change layers often, choose something that stuffs into its own pocket.
The Three Main Types of Mid Layers
Now that you know the factors, let us look at the actual products you will find in stores. Each type has strengths and weaknesses.
Fleece Jackets
Fleece is the old reliable of snowboarding. It is soft, stretchy, and breathes better than anything else. It is not very wind-resistant, but your shell takes care of that. Fleece works best in mild to average temperatures. It is also the cheapest option. Look for grid fleece (like Polartec Power Grid) because it has a pattern that traps heat while letting moisture escape. The downside is that fleece is heavy and does not pack small. It is also not very warm on its own in extreme cold.
Synthetic Insulated Jackets
These are the most popular all-around mid layers. They look like puffy jackets but use man-made fibers. They are warmer than fleece, more weather-resistant, and still breathe okay. They are perfect for average to cold days. The best synthetic jackets use materials that mimic the loft of down without the wet-weather problems. They are also usually machine-washable, which is a big plus for snowboarders who get dirty. The main drawback is that they lose a bit of warmth over many years as the fibers break down.
Down Insulated Jackets
Down is the king of warmth-to-weight. A down mid layer will keep you toasty on the coldest chairlift rides. It is also incredibly compressible, so you can stuff it in your backpack when the sun comes out. The big warning is water. If you ride in wet snow or rain, down will clump up and stop working. You need a very good waterproof shell on top to use down safely. Also, good down is expensive. Cheap down uses low-quality feathers that poke through the fabric and do not trap much heat.
Comparing Mid Layers: A Quick Reference Table
| Feature | Fleece | Synthetic Insulation | Down Insulation |
|---|---|---|---|
| Warmth | Low to Medium | Medium to High | Very High |
| Breathability | Excellent | Good | Poor |
| Wet-Weather Performance | Good (dries fast) | Excellent (still warm when wet) | Very Poor (loses warmth when wet) |
| Packability | Poor | Good | Excellent |
| Price | $ (Budget) | $$ (Mid-range) | $$$ (Expensive) |
| Best For | Mild days, park riding | All-around, variable weather | Very cold, dry climates |
Layering Tips for Maximum Comfort
Your mid layer does not work alone. It is part of a three-layer system. Here is how to make all three work together.
Start with a Good Base Layer
Your base layer should be merino wool or synthetic. It must fit tight against your skin. This layer pulls sweat away so your mid layer can push it outward. Never wear cotton as a base layer. It traps moisture and ruins the whole system.
Match Your Shell to Your Mid Layer
If your mid layer is very thick and puffy, your shell needs to be roomy. If your shell is tight, choose a thinner mid layer. Try them on together before buying. Lift your arms above your head. If you feel restricted or the shell lifts up too high, the combination does not fit.
Use Vents to Regulate Heat
Even with the perfect mid layer, you will get hot sometimes. That is why most snowboard shells have pit zips (underarm vents). Open these for a minute when you start to sweat. This lets heat escape without removing your mid layer. Close them again before the chairlift to trap the warmth back in.
Common Mistakes to Avoid
Even experienced riders make these errors. Read through them so you do not waste money on the wrong gear.
- Buying a mid layer that is too heavy: Unless you ride in -20°C weather, a heavy down jacket as a mid layer will make you overheat. You will end up riding with it unzipped, which defeats the purpose.
- Ignoring zipper quality: Cheap zippers break easily. Look for YKK zippers. They are the industry standard and last for years.
- Forgetting about pockets: Some mid layers have chest pockets for your phone or lift pass. These are very handy. But make sure the pockets do not add bulk under your shell.
- Choosing style over function: That trendy oversized hoodie may look cool, but it will not keep you warm. Snowboarding mid layers are technical garments. Buy them for performance first.
Budget Considerations
Good mid layers range from $50 to over $400. You do not need to spend a fortune. Here is how to decide:
- Under $100: Look for fleece jackets from brands like Columbia or The North Face. They are basic but effective for mild conditions.
- $100 – $200: This is the sweet spot. You can find excellent synthetic jackets from Patagonia, Marmot, or Outdoor Research. These will last you many seasons.
- Over $200: You are paying for premium down, ultralight fabrics, and advanced breathability. Only buy this if you ride very often or in extreme cold.
Final Checklist Before You Buy
To make your choice easier, run through this checklist when you are at the store or shopping online.
- Does it fit comfortably over your base layer and under your shell?
- Is the insulation type right for your usual weather?
- Can you move your arms freely without the layer riding up?
- Does it have a good balance of warmth and breathability for your activity level?
- Is the material quick-drying and moisture-wicking?
- Does it pack down small if you need to store it in a backpack?
Choosing the right mid layer is not complicated. Start with the weather you ride in most often. Then pick the insulation type that matches. Finally, make sure the fit works with your other gear. A smart choice here will make every day on the mountain more enjoyable. You will stay warm, dry, and focused on your riding instead of shivering or sweating. Take your time, try a few options, and trust the process. Your perfect mid layer is out there waiting for you.