How to Wax a Snowboard without an Iron?
A specialized iron is an essential piece of equipment when waxing a snowboard. It serves a purpose, which is melting and spreading the wax evenly on the board. Without using an iron, you cannot melt the wax and it cannot be applied to the board. You can use a regular household iron for melting purposes and application purposes but it will ruin the iron and it will no longer be used with your clothes. You can wrap aluminum foil around the base of the iron to protect it. But there’s another way of melting and applying wax and that is a pan. You also wrap aluminum foil around the base of the pan and use it like iron. It severs the same purpose.
Things you need
Before you start waxing your snowboard at home, you need a few things and they are as follows:
- Wax: Get an all-temp wax and it’s going to work fine in most situations
- F-clamps: A couple of F-clamps for securing the board
- Gummy stone: For de-burring edges and removing rust from the edges of your snowboard
- Steel brush: For brushing the board before applying wax
- Scraper: A piece of acrylic (5mm width) for scarping the excess wax
- Nylon-style brush: For structuring the base
- Aluminum foil: For wrapping around the base of the pan to protect your pan and board
- Pan: It will be used instead of the iron for melting and applying wax
Once you gather all the supplies, it’s time to start waxing.
Secure your board
The first step is to secure your snowboard in place. If you don’t trust yourself not to make a large mess, do the waxing on the floor with a piece of cardboard underneath. In a workshop, they would use special tools for the task but if you are doing it at home, you can use a couple of F-clamps. I am sure you could think of dozens of other ways.
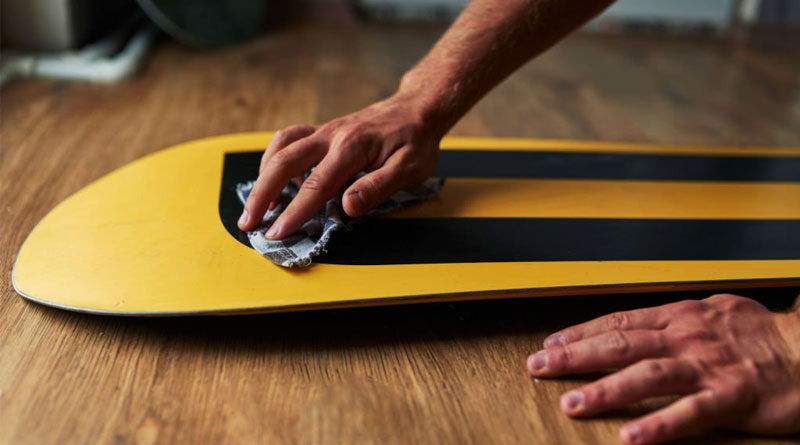
Clean your board
The next step is to clean your board. If your board is new or has never seen snow before, you can skip this step. Look to see if there are any blemishes along the edge or any blemishes within the base any dirt, corrosion, pollen, or anything of that sort. The reason that you want to check your edges with your gummy stone or your stone by laying it flat is you want to make sure that there are no burrs or cracks. It’s always good to make sure that you have nice smooth edges. If they need to be filled down, you can do that but a gummy stone for the most part will help you feel those burrs out.
Brush your board
Once you’ve cleaned your board, the next step is to brush it. To do this, brush the board with a steel brush instead of using a chemical compound to remove wax from the pores. I am a firm believer that all porous boards should always have wax constantly built up within those pores. Sometimes you’ll notice the edges of the board become gray and that means the board’s base has been stripped of all of its moisture or wax. Brush your board from tip to tail. Never brush against the grain or go perpendicular to the rails. Always brush the board parallel to the rails. Apply a good amount of pressure and remove all of the remaining wax from the pores.
Apply the wax
Snowboard wax melts around 210-250°F. In terms of waxing, there are a few options. There’s an orthodox way of buying a specialized iron but they’re not too cheap. The second option is using a conventional household iron. But for me someone who’s going to wax snowboard at most once a year, this is not going to be worth it. Because you need to understand that once you use your iron for waxing, it can no longer be used with your clothes. There’s a way to protect your iron from wax by using aluminum foil. You can wrap a foil around the base of your iron and it will work just fine. There’s a third option, which is melting wax without the help of any iron and that’s exactly what I am going to show you in this article.
Use aluminum foil and wrap it around the base of the pan. Again, using the foil is to protect both your pan and board. Now, heat it up for about 20 to 30 seconds. Now take the bottom of the heated pan and cube of wax, apply the wax to the heated surface of the pan, and slowly drip it around your board. That way, you’ll have a nice scoop of wax on your board. Put as much wax as want. Again, take your pan and just crease along the edges. Apply the pan gently to the board melting the wax. You might want to re-heat your pan because there’s no guarantee of how long it’s going to retain its temperature. Once you’re satisfied with the amount of wax, wait at least an hour to cool down the wax before you start scraping.
Scrape the excess wax
The next step is to scrape the excess wax from the board. Make sure you hold the scraper leaning in the direction you’re going to scrape. Push the scraper away from your body because that requires less energy than any other way. Apply light pressure because you don’t want to damage your board. Also, make sure you are going lengthwise. A scraper creates microscopic grooves and you want them to work with you not against you. When scraping, too much wax will stick to the scraper. So you need to clean it off constantly. It does take a few minutes but you’re not making yourself any favors leaving patches of excess wax so be patient.
Structure your base
As an absolute minimum, you can stop here. But if you want to separate yourself from the people who carry their snowboards through the flat bits and glide past them, you need to structure your base. You can do this by going up and down with a soft nylon brush or you can do it with structuring pads and a block of cork. Take the nylon brush and brush it from tip to tail. Put some pressure and make some nice overlapping strokes.
And there you have it. With just simple tools, you can wax your snowboard at home without any snowboard-specific iron. Make sure you check your edges and base before riding.